 This is the testing phase of my embroidery plans. I'll probably adjust it a little from this, but this is a rough start for the sleeve embroideries. I have not tested the second diagonal pattern (which is simple) nor the round symbols around the neckline etc etc. I also need to figure out how to do the decorated seams.
However! I just bought some silver sequin spider web sheer fabric from Joann's and now I'm all a-buzz about what my halloween outfit is going to look like. I have a spider web sheer jacket with a peplum and dangling sleeves from Hot Topic circa 2000, and I'm going to make a sheer overskirt with the new fabric and a black long slip or dress. Maybe if I get off my butt and do it soon, I can do silver spider details along the skirt too!
Of course, I have all of these embroidery plans, but who knows how much I'll actually want to do that considering my student and I will be working on her senior collection this year and MUCH of it will be embroidering bugs onto sheer and see-through jackets and skirts. So, we shall see!
This is the testing phase of my embroidery plans. I'll probably adjust it a little from this, but this is a rough start for the sleeve embroideries. I have not tested the second diagonal pattern (which is simple) nor the round symbols around the neckline etc etc. I also need to figure out how to do the decorated seams.
However! I just bought some silver sequin spider web sheer fabric from Joann's and now I'm all a-buzz about what my halloween outfit is going to look like. I have a spider web sheer jacket with a peplum and dangling sleeves from Hot Topic circa 2000, and I'm going to make a sheer overskirt with the new fabric and a black long slip or dress. Maybe if I get off my butt and do it soon, I can do silver spider details along the skirt too!
Of course, I have all of these embroidery plans, but who knows how much I'll actually want to do that considering my student and I will be working on her senior collection this year and MUCH of it will be embroidering bugs onto sheer and see-through jackets and skirts. So, we shall see!
Showing posts with label projects. Show all posts
Showing posts with label projects. Show all posts
Monday, September 5, 2016
New Projects as Always :)
I realize that the last post I made was talking about the vyshyvanka that I want to make. It's still a plan (I bought a bolt of linen eeee! :D) but I have every intention of it being a winter project. I'll also make a shirt or two for my husband out of the linen. It's a little sheer, so I'll have to see how to get it so that I don't need a slip underneath as that'd be a pain in the butt.
 This is the testing phase of my embroidery plans. I'll probably adjust it a little from this, but this is a rough start for the sleeve embroideries. I have not tested the second diagonal pattern (which is simple) nor the round symbols around the neckline etc etc. I also need to figure out how to do the decorated seams.
However! I just bought some silver sequin spider web sheer fabric from Joann's and now I'm all a-buzz about what my halloween outfit is going to look like. I have a spider web sheer jacket with a peplum and dangling sleeves from Hot Topic circa 2000, and I'm going to make a sheer overskirt with the new fabric and a black long slip or dress. Maybe if I get off my butt and do it soon, I can do silver spider details along the skirt too!
Of course, I have all of these embroidery plans, but who knows how much I'll actually want to do that considering my student and I will be working on her senior collection this year and MUCH of it will be embroidering bugs onto sheer and see-through jackets and skirts. So, we shall see!
This is the testing phase of my embroidery plans. I'll probably adjust it a little from this, but this is a rough start for the sleeve embroideries. I have not tested the second diagonal pattern (which is simple) nor the round symbols around the neckline etc etc. I also need to figure out how to do the decorated seams.
However! I just bought some silver sequin spider web sheer fabric from Joann's and now I'm all a-buzz about what my halloween outfit is going to look like. I have a spider web sheer jacket with a peplum and dangling sleeves from Hot Topic circa 2000, and I'm going to make a sheer overskirt with the new fabric and a black long slip or dress. Maybe if I get off my butt and do it soon, I can do silver spider details along the skirt too!
Of course, I have all of these embroidery plans, but who knows how much I'll actually want to do that considering my student and I will be working on her senior collection this year and MUCH of it will be embroidering bugs onto sheer and see-through jackets and skirts. So, we shall see!
This is the testing phase of my embroidery plans. I'll probably adjust it a little from this, but this is a rough start for the sleeve embroideries. I have not tested the second diagonal pattern (which is simple) nor the round symbols around the neckline etc etc. I also need to figure out how to do the decorated seams.
However! I just bought some silver sequin spider web sheer fabric from Joann's and now I'm all a-buzz about what my halloween outfit is going to look like. I have a spider web sheer jacket with a peplum and dangling sleeves from Hot Topic circa 2000, and I'm going to make a sheer overskirt with the new fabric and a black long slip or dress. Maybe if I get off my butt and do it soon, I can do silver spider details along the skirt too!
Of course, I have all of these embroidery plans, but who knows how much I'll actually want to do that considering my student and I will be working on her senior collection this year and MUCH of it will be embroidering bugs onto sheer and see-through jackets and skirts. So, we shall see!

Friday, July 22, 2016
New Project
So in my love of the 1920s and linen, I discovered that embroidered linen dresses was a really common theme in the past 100 years, not just the 1920s. However, you get into racist overtones. Whether it's the Mexican version of the embroidered dress, or the "gypsy fashion!" Romani version of the embroidered dress, you see a lot of "I'm a white tourist in your country who wants to buy your shit". And then I discovered/re-remembered that Slavic style was ALSO considered "exotic" in the 1920s. Enter the Вишиванка. (N.B. I haven't installed Cyrillic alphabet keyboard on this comp, so the rest will be Roman alphabet.)
The Vyshyvanka is the traditional embroidered shirt or chemise in Ukrainian national costume.

 As I have Ukrainian heritage, I feel comfortable wearing a Ukrainian embroidered garment. Because I am cheap, insane, and talented, I of course want to make it. This has meant research.
Research into what embroideries are common, what stitches are common (answer: it's VERY VERY regional). Research with very little information as to where my Great Grandfather came from (I got diddly on my Great Grandmother, not to mention it was her PARENTS who immigrated). I have my Great Grandfather's original name before Ellis Island. That... helps very little. Apparently his first name is a common Rusyn name (from Transcarpathian region of Ukraine, Slovakia and Romania). Apparently variation of his last name are from either Slovakia or Austria. Apparently he was BORN in Austria, but identified as Ukrainian. All of these little bits of information has meant that I will be basing my embroidery off of the Bukovyna area in Ukraine.
Bukovynian Vyshyvanka look like this:
As I have Ukrainian heritage, I feel comfortable wearing a Ukrainian embroidered garment. Because I am cheap, insane, and talented, I of course want to make it. This has meant research.
Research into what embroideries are common, what stitches are common (answer: it's VERY VERY regional). Research with very little information as to where my Great Grandfather came from (I got diddly on my Great Grandmother, not to mention it was her PARENTS who immigrated). I have my Great Grandfather's original name before Ellis Island. That... helps very little. Apparently his first name is a common Rusyn name (from Transcarpathian region of Ukraine, Slovakia and Romania). Apparently variation of his last name are from either Slovakia or Austria. Apparently he was BORN in Austria, but identified as Ukrainian. All of these little bits of information has meant that I will be basing my embroidery off of the Bukovyna area in Ukraine.
Bukovynian Vyshyvanka look like this:
 The bulk of the embroidery is on the sleeves, which is in three sections. A horizontal pattern on top, a monochromatic (and usually pale) band in the middle, and diagonal or vertical stripes toward the wrist. There are vertical bands alongside the front opening and the neckline, and occasionally a band near the hem. The embroidery patterns I'm going to use are based off of these two images:

 However, in my practice efforts at embroidering, the middle band, which uses a stitch called morshchynka, is my least favorite embroidery stitch ever.
 I find it difficult to use and unwieldy. Oh well. We shall see how it goes.
As I have Ukrainian heritage, I feel comfortable wearing a Ukrainian embroidered garment. Because I am cheap, insane, and talented, I of course want to make it. This has meant research.
Research into what embroideries are common, what stitches are common (answer: it's VERY VERY regional). Research with very little information as to where my Great Grandfather came from (I got diddly on my Great Grandmother, not to mention it was her PARENTS who immigrated). I have my Great Grandfather's original name before Ellis Island. That... helps very little. Apparently his first name is a common Rusyn name (from Transcarpathian region of Ukraine, Slovakia and Romania). Apparently variation of his last name are from either Slovakia or Austria. Apparently he was BORN in Austria, but identified as Ukrainian. All of these little bits of information has meant that I will be basing my embroidery off of the Bukovyna area in Ukraine.
Bukovynian Vyshyvanka look like this:
 The bulk of the embroidery is on the sleeves, which is in three sections. A horizontal pattern on top, a monochromatic (and usually pale) band in the middle, and diagonal or vertical stripes toward the wrist. There are vertical bands alongside the front opening and the neckline, and occasionally a band near the hem. The embroidery patterns I'm going to use are based off of these two images:

 However, in my practice efforts at embroidering, the middle band, which uses a stitch called morshchynka, is my least favorite embroidery stitch ever.
 I find it difficult to use and unwieldy. Oh well. We shall see how it goes.
Wednesday, July 13, 2016
Middle of the Night Wedding Dress Update
So sewing the pleats down took more like 3 or 4 hours. Attaching the crin took more like an hour and a half. I'm halfway done with folding up the hem, but I'll also need to go back through and keep the up-fold of the hem tacked down (long story short, due to wonkiness with the hem length, it's a three step process instead of a two step process. boohoo me).
I have ten hours before my client picks it up. And I am burnt out for now. I'm finding it difficult to soldier on. (And I literally could not open my eyes this morning for my intended morning sewing.) Looks like it's bed and an early morning for me. There's NOT much to do, but it just feels never ending.
Blargle.
Monday, July 11, 2016
Wedding Dress Update
My client had final fittings today. The bad news is: it doesn't fit perfectly out of the box. The good news is: it's too BIG. Which is totes manageable.
So what I have left to do before she picks the dress up on Wednesday noon:
-- tack down the new pleat positions, < 1 hour
-- adjust the fit at the very top, 30 mins
-- attach crin to the bottom, < 1 hour
-- hem, 45 mins
-- attach inner facing along top, 1 1/2 hours
-- attach button and buttonhole tab above zipper, 30 mins
-- add additional hook on halter, 10 mins
So yeah. Very do-able. Very good news. IT'S ALMOST DONE :D
Wednesday, June 29, 2016
Sewing Updates
I am awaiting boning tips which should come in tomorrow. I should have ordered them ages ago, but stupid me as usual kept forgetting.
This was my last to-do list for the wedding dress:
To Do Before Saturday:
-- iron fabric
-- trace out pattern on silk
-- trace out pattern on cotton
-- finish seam allowances
-- cut out silk
-- cut out cotton
-- flat line cotton to silk
-- grade seam allowance
-- zigzag finish seam allowance
-- flat fell lining together
-- put in boning casing
-- put in boning
-- fully finish the halter straps
-- deal with tulle
-- zipper??
It is now at:
-- iron fabric
-- trace out pattern on silk
-- trace out pattern on cotton
-- finish seam allowances
-- cut out silk
-- cut out cotton
-- flat line cotton to silk
-- grade seam allowance
-- zigzag finish seam allowance
-- flat fell lining together
-- put in boning casing
-- deal with tulle
-- iron outer fabric
-- fully finish the halter straps
-- figure out hem circumference of outer fabric
-- pin pleating attempts
-- cut out pieces for outer fabric
-- zigzag cut edges of outer fabric
-- french seam along panels and gores
-- cut and tip bones
-- put in boning
-- edge neckline with fashion fabric
-- pin pleating along hipline
-- pin pleating along neckline
-- confirm that the measurements work
-- stitch pleating in place
-- set zipper
-- attach hook and eyes
-- figure out hem length on Fluffy
-- hem lining
-- hem outer fabric with horsehair braid
Most of what remains is hand work. I can hem the lining with the machine, but everything else is handwork. Which, I rather like. Honestly, I've been enjoying my work on Fluffy's dress, as it's a puzzle to figure out, and it feels much like my work with Y, in terms of "not my project so it's kinda interesting". Also the amount of handwork is much higher than I usually allow myself for my own projects.
Speaking of my own projects, I meant to do a fair amount of work on the bridesmaid dress today, as I couldn't move forward on the wedding dress without bone tips. What did I accomplish? Ironing the silk habotai, washing and drying by way of the iron my lining fabric, and unpicking the curtain hems someone had hilariously terribly sewn into said lining fabric. Oh, and a quick burn test of the lining fabric. It appears to be mostly cotton, with perhaps a little poly added. Something WAS bubbling, but it nearly burned cleanly away. What I still have to do on that:
-- double check pattern
-- trace pattern onto silk
-- trace pattern onto cotton
-- add seam allowance
-- cut out silk
-- cut out cotton
-- hem cotton
-- flat line cotton and silk
-- trim seam allowances down evenly
-- zigzag edge seam allowances
-- sew darts
-- sew seams
-- finish neckline
-- finish armscye
-- install zipper
-- figure out pattern for bolero and ruffles
-- iron silk chiffon
-- trace bolero and ruffles onto silk
-- add seam allowance
-- cut out silk
-- zigzag edge
-- attach ruffles
-- attach bolero
-- make big flower for shoulder closure
I'm just not enthused about making this stupid bridesmaid dress. I'm just not particularly enthused about anything involving this wedding. We have the bachelorette party this weekend, and then only a week and a half away is the wedding itself. I'd much rather be sewing the wedding gown that I'm getting paid for, than the bridesmaid gown for a wedding that continually demands monetary support from me.
Thursday, June 23, 2016
Wedding Dress Update
I am finding it difficult to keep pushing through working with the silk habotai for the lining. It shifts and wiggles under my ruler and so I can only draw lines 1-2" long at a time. I traced out and added seam allowance for the stability layer (cotton) in 15 mins flat. I've been working on the silk for a few days.
It wearies me. I have 3 more pieces to retrace (because chalk fades while working) and add seam allowance to before I cut it out. Once I have the two layers flat-lined, the silk should behave. But I have to get it there. AND be careful while flatlining to not have the silk shift its grain.
To Do Before Saturday:
-- iron fabric
-- trace out pattern on silk
-- trace out pattern on cotton
-- finish seam allowances
-- cut out silk
-- cut out cotton
-- flat line cotton to silk
-- grade seam allowance
-- zigzag finish seam allowance
-- flat fell lining together
-- put in boning casing
-- put in boning
-- fully finish the halter straps
-- deal with tulle
-- zipper??
Luckily, I had a piece of periwinkle blue cotton THE PERFECT SIZE to use as the stability layer. Seriously, I have had magical luck with fabric lengths. I also had given my client the perfect number for the lining fabric. And this is "fits perfectly without magic tricks to eke out more space". It's a stress-free "fits perfectly".
Wednesday, March 2, 2016
Couture Design
My student Y is taking a course on Couture Design, as the final construction course before she starts her year-long senior project as a Fashion Design major. We've been having so much fun, all the hand-sewing, and with 14 yards of silk draped across us... I've been taking pictures of course, as it's been such a treat.
 Here's the general idea for the skirt. This is merely pinned onto the mannequin, I think we'll actually sew it to the waistband today.
 Lookit all the pretty fabric! We were handstitching the second hem, encasing the horsehair braid (one side has 6" braid, the other has 3" braid -- and it's all invisibly handsewn).
 A closeup shot of the stitching for the hem. It winds up going pretty fast, for all that it seems to take forever!
 And this is the top that accompanies it. We finished it yesterday (although the hem needs adjustment. It was finicky and some of the bones are a little too long). This is the second top design, and it's roughly based off of a dress that Y's mother made for a client. The initial top design was going to use a tshirt with the cover art of Le Petit Prince that had been embellished by embroidery and beading.
 Comme ça. This particular stitch is whipped back stitch, in silver metallic thread.
 Here's the general idea for the skirt. This is merely pinned onto the mannequin, I think we'll actually sew it to the waistband today.
 Lookit all the pretty fabric! We were handstitching the second hem, encasing the horsehair braid (one side has 6" braid, the other has 3" braid -- and it's all invisibly handsewn).
 A closeup shot of the stitching for the hem. It winds up going pretty fast, for all that it seems to take forever!
 And this is the top that accompanies it. We finished it yesterday (although the hem needs adjustment. It was finicky and some of the bones are a little too long). This is the second top design, and it's roughly based off of a dress that Y's mother made for a client. The initial top design was going to use a tshirt with the cover art of Le Petit Prince that had been embellished by embroidery and beading.
 Comme ça. This particular stitch is whipped back stitch, in silver metallic thread.
Tuesday, January 12, 2016
Knitting Woes
 I've been working on this sweater for a few days. Right after I finished the lumbar pillow, I wanted to keep knitting. And for once in my life, I wanted to work on a vintage fingering-weight sweater. I already had the gigantic cone of wool fingering. So I started working on a gorgeous pattern.
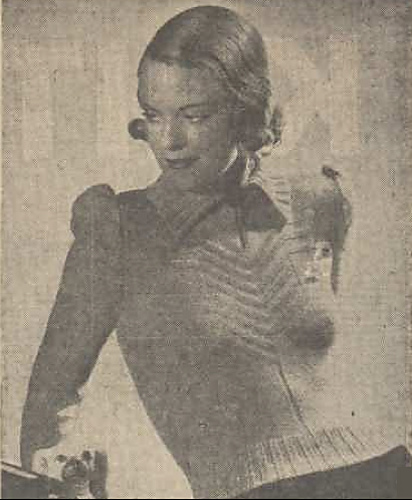 And I'm blithely following the directions:
Commence at lower edge with 123 sts. on No. 12 needles. Work in rib of k. 3, p. 3, for 3 ins. Change to No. ll needles and continue in stocking-web until work measures 12 inches on underarm, keeping centre 3 sts. in purl on right side (reverse stocking-web) to continue the purl rib from welt.Sounds great right? It wasn't until I'm 7.5" inches along my journey (4.5 of that in plain stockinette aka 36 rows or so) that I read the next line.
At the same time increase one stitch both ends of every 8th row until there are 143 sts., after which work straight for about 22 rows.Well. Here's to frogging 4 inches.
Saturday, January 9, 2016
Lumbar Pillow
 So earlier this week, my partner mused aloud that our couch pillows are really too large for a lumbar pillow, and that we don't actually have anything that'd work. He wound up bunching up a shirt behind his back.
Flash forward to I was itching to knit a few days ago. While browsing the Homegoods section of my favorited patterns on Ravelry, I found this Fair Isle stranding knitting chart. Since I had no experience in stranded knitting, a rectangle seemed like a good way to ease into the process. It was a lot of fun to knit up (it was a 3 day process), and the chart was well written. My one problem with the chart was it had no numbers on it (row numbers, etc.) and I have traditionally done poorly with counting charts. So I wrote out 119 rows worth of numbers. They look like such horrible things as: 23) 4 / 3 / 1 / 1 / 10 / 3 / 3 / 3 / 3
Since the pattern was fully mirrored, I went to the middle number and would work backwards for the second half. I knit this flat, in stockinette. So every other row is purled. I also had at least one row where I had a mistake that I did not correct, and in the second chart, I either doubled a row or skipped a row as my right side of the fabric changed from odds to evens.
Finished measurements are 8"x19" (if flat), and I backed the knitting in fabric (so that my floats didn't get stuck in the stuffing and so stuffing didn't leak) and added a fabric back for the pillow. I then stuffed it with more reused stuffing from the giant duck of "oh gods why is it in my house". Some of my floats weren't long enough, so that while un-pillowed, the knitting bubbled a little. But it's evened out and is apparently quite functional as is.
I like quick projects!
So earlier this week, my partner mused aloud that our couch pillows are really too large for a lumbar pillow, and that we don't actually have anything that'd work. He wound up bunching up a shirt behind his back.
Flash forward to I was itching to knit a few days ago. While browsing the Homegoods section of my favorited patterns on Ravelry, I found this Fair Isle stranding knitting chart. Since I had no experience in stranded knitting, a rectangle seemed like a good way to ease into the process. It was a lot of fun to knit up (it was a 3 day process), and the chart was well written. My one problem with the chart was it had no numbers on it (row numbers, etc.) and I have traditionally done poorly with counting charts. So I wrote out 119 rows worth of numbers. They look like such horrible things as: 23) 4 / 3 / 1 / 1 / 10 / 3 / 3 / 3 / 3
Since the pattern was fully mirrored, I went to the middle number and would work backwards for the second half. I knit this flat, in stockinette. So every other row is purled. I also had at least one row where I had a mistake that I did not correct, and in the second chart, I either doubled a row or skipped a row as my right side of the fabric changed from odds to evens.
Finished measurements are 8"x19" (if flat), and I backed the knitting in fabric (so that my floats didn't get stuck in the stuffing and so stuffing didn't leak) and added a fabric back for the pillow. I then stuffed it with more reused stuffing from the giant duck of "oh gods why is it in my house". Some of my floats weren't long enough, so that while un-pillowed, the knitting bubbled a little. But it's evened out and is apparently quite functional as is.
I like quick projects!
Wednesday, December 30, 2015
Sewing Plans
Ok. So January's sewing plans aka Time Before Yvonne Comes Back. Finish my suit skirt. I need to take out the machine hem, put in hem tape, hem it by hand, rehem the clusterfuck that is the lining, attach lining hem to outer hem, and everything involving the waistband.
Make the suit jacket. I keep delaying because I have to clean the studio and wah wah wah.
Get my butt in gear for Metamorphoses. I meet with a second assistant next week. The next production meeting is 1/23, but I want to have plenty done by then.
Fix my purple plaid skirt. It's currently unwearable as I cannot take a full step in it. I HAVE extra fabric to use to make it walkable, I just haven't inserted it yet.
Saturday, December 19, 2015
Skirt Drafting
 The basic Edwardian 5-Gore Skirt pattern that I found was designed for a tiny person, with a length of only 36 inches. So as to keep the proportions the same, I found the length for MY person (45 inches roughly) and scaled it up. This involves dividing every number by 4, and then multiplying it by 5 for the finished numbers. (The image is of MY new numbers). This allows for a skirt front to have center front numbers from 5.5" -> 6.825", 11.5" -> 14.325" etc etc. It should be pretty obvious, but I go to the nearest 1/8th of an inch. I don't like fussing about sixteenths.
And that's the basics for redrafting a design that already has measurements all over it (like most Victorian/Edwardian drafting). The main difference between this pattern and my actual skirt will be length. I adjusted the pattern for full length, but I'm only going to go to upper calf length.
In order to do the wrap-around-Hong-Kong seam finish, while my wool will have 1" seam allowance all around, my silk will have 1.75" seam allowance, so as to allow for a 3/8" seam edging.
I will get a chance to start breaking into my fabric after my last student of the day, who should be here in 10 mins or so. I'm excited!
The basic Edwardian 5-Gore Skirt pattern that I found was designed for a tiny person, with a length of only 36 inches. So as to keep the proportions the same, I found the length for MY person (45 inches roughly) and scaled it up. This involves dividing every number by 4, and then multiplying it by 5 for the finished numbers. (The image is of MY new numbers). This allows for a skirt front to have center front numbers from 5.5" -> 6.825", 11.5" -> 14.325" etc etc. It should be pretty obvious, but I go to the nearest 1/8th of an inch. I don't like fussing about sixteenths.
And that's the basics for redrafting a design that already has measurements all over it (like most Victorian/Edwardian drafting). The main difference between this pattern and my actual skirt will be length. I adjusted the pattern for full length, but I'm only going to go to upper calf length.
In order to do the wrap-around-Hong-Kong seam finish, while my wool will have 1" seam allowance all around, my silk will have 1.75" seam allowance, so as to allow for a 3/8" seam edging.
I will get a chance to start breaking into my fabric after my last student of the day, who should be here in 10 mins or so. I'm excited!
Friday, December 18, 2015
Updates on VSS and Suit
So I mailed out the package to my Secret Santa giftee yesterday. I wrapped everything and drew a little Christmas themed image with silver sharpie. I also wound up using the LAST of the burgundy/gold star wrapping paper that I got when I was in college! It's weird to not have it still around. :-P
I definitely didn't have time to make a full vintage suit before my wedding, but I'm borrowing a blouse from the mother of two of my students (her face when I said I'd find something lying around my house was absolutely hilarious), and I WILL have time to make the skirt for the suit this weekend.
While proctoring this week I finalized the design and I wrote out the steps. It'll be a upper-calf length skirt, based off of the Edwardian 5-gore skirt I used for Earnest, and with lots of pleating in the back panels. It'll also be flatlined with the wrap-around sneaky method (you wind up with "hong kong" finished edges as well as the lining.
Steps for Skirt
1) Re-draft pattern for my measurements. Make sure to adjust BOTH width and length uniformly.
2) Double check seam lengths before finalizing.
3) Cut out wool and silk.
4) Zigzag edges of all pieces.
5) Hem silk panels.
6) Attach silk to wool.
7) Stitch side seams.
8) Set zipper.
9) Pleat back panels.
10) Interface waistband.
11) Bias bind waistband edge.
12) Attach waistband; use stitch in the ditch coupled with bias bound edge for inner edge.
13) Attach hem tape to wool.
14) Catch stitch hem of wool.
15) Slip stitch silk hem to wool hem.
16) Handwork buttonhole.
17) Attach button and garment loops.
I will try to photodocument this process, but it's mostly straight forward.
********************************************
I ALSO put together a basic step order for the suit jacket:
- make mock-up to test fit
- cut out wool
- bound buttonholes
- interfacing! carrier strips, pad stitching, tailor basting, etc.
- twill tape on roll line
- interlining
- seaming
- cut and sew lining
- attach pockets
- lining + jacket
- hand sew hems at sleeves and body
** Interline jacket with flannel to protect from hair canvas through thin lining **
interline sleeves?
add tiny double welt pockets near shoulder?
Wednesday, December 2, 2015
Update
So after a long phone call to Mood Monday, I got my order straightened out. They've been having problems with their email system, and I should expect my order by the end of this week.
I ordered red and black herringbone wool for my suit (finally getting around to that...), peridot silk for the lining and a matching blouse (probably a pussy bow cause I want one), and a blush silk to make myself a new slip. I still need to purchase thread (which I'll do when it arrives) and hair canvas but that I can do at my local store. Boy am I happy that Y and I spent this semester working on a tailored jacket for her pattern drafting class. I feel much more confident in my ability to do this. As to whether or not I'll make A's suit... probably not. I would like to, but I still don't have a working pattern that I feel confident in and I lost a lot of steam. Maybe when my MassArt kids go on break and my concerts are over I'll find the time? But then I only have a week. And mysteriously there are other things I could do with that week. Like clean my house. Start teaching baby oboe how to make reeds.
In other news, my crocheted turban has up and disappeared. I last saw it on the night of strike for Earnest (so... 11/21). I was going to wear it that night, and then haven't seen it since. So I'm trying to decide if I want to make it again. I really liked it, but that sounds like effort.
I want to buy the wool to replace my zip up lace up jacket since it's falling apart in every direction and it's such a great coat. Maybe I'll actually finish my fur lined one this year too? It's not been cold enough to need it so far.
Monday, September 14, 2015
Finished Turban
I finished the crocheted turban from 1915 that I'd been working on. I keep wandering around the house with my head all wrapped in cozy yarn. :-P My partner says it looks like a bonnet more than what he thinks of as a turban and that my clothing doesn't match.
Lots of pics!


 And here's the ravelry post. I had initially started crocheting this with white Cream 'n Sugar yarn, got 60% of the way complete, and realized that it made too stiff of a fabric and that I needed to use something else. So I pulled out more of that neverending cream stashyarn (wool/cashmere blend I think, frogged from a HUGE Abercrombie men's sweater from Goodwill) and unhappily put it together. It took a lot longer to go the second time through :-P But complete it is, minus some weaving in of ends.
It's fairly comfortable, although it doesn't like going over my hair when it's up in a clip. But it stays put, and goes on easily. And it's LIGHT on my head, though it feels nice and cozy.
And here's the ravelry post. I had initially started crocheting this with white Cream 'n Sugar yarn, got 60% of the way complete, and realized that it made too stiff of a fabric and that I needed to use something else. So I pulled out more of that neverending cream stashyarn (wool/cashmere blend I think, frogged from a HUGE Abercrombie men's sweater from Goodwill) and unhappily put it together. It took a lot longer to go the second time through :-P But complete it is, minus some weaving in of ends.
It's fairly comfortable, although it doesn't like going over my hair when it's up in a clip. But it stays put, and goes on easily. And it's LIGHT on my head, though it feels nice and cozy.


 And here's the ravelry post. I had initially started crocheting this with white Cream 'n Sugar yarn, got 60% of the way complete, and realized that it made too stiff of a fabric and that I needed to use something else. So I pulled out more of that neverending cream stashyarn (wool/cashmere blend I think, frogged from a HUGE Abercrombie men's sweater from Goodwill) and unhappily put it together. It took a lot longer to go the second time through :-P But complete it is, minus some weaving in of ends.
It's fairly comfortable, although it doesn't like going over my hair when it's up in a clip. But it stays put, and goes on easily. And it's LIGHT on my head, though it feels nice and cozy.
And here's the ravelry post. I had initially started crocheting this with white Cream 'n Sugar yarn, got 60% of the way complete, and realized that it made too stiff of a fabric and that I needed to use something else. So I pulled out more of that neverending cream stashyarn (wool/cashmere blend I think, frogged from a HUGE Abercrombie men's sweater from Goodwill) and unhappily put it together. It took a lot longer to go the second time through :-P But complete it is, minus some weaving in of ends.
It's fairly comfortable, although it doesn't like going over my hair when it's up in a clip. But it stays put, and goes on easily. And it's LIGHT on my head, though it feels nice and cozy.
Monday, August 24, 2015
Found You, Fishnets!
So it turns out that one of the designers who I'd bookmarked for Fishnets HADN'T disappeared, just decoupled her Ravelry and her blog. So. I'm archiving it here so I don't lose it again. Source.


Foo Foo Yarn: One hank of Malabrigo laceweight baby merino 3.25mm hook split ring markers darning needle gauge: 44sc in rnd = 8 1/2″ Pattern as is makes a US 9 Women’s. Chain 16, flip the chain, sc into the bottoms bumps for 15 sc, flip the chain again, sc in the top loops for a total of 30 sc in the round. You can mark side sts at either end or eyeball them. The increase sequence is like my other sock toes: round one, work inc before and after each marker. For round two, work even. Work like this until the toe is as wide as you want it, about 1/2 to 3/4″ less than the width of the ball of your foot. When you hit that size, work even until the toe cap is about 2-2 1/2″ deep or desired depth. Netting: starting at the side of your toe cap, chain 4, skip the next 3 sts, sc in next one, ch 4, skip the next 3 sts, sc in the next one, work like this around, don’t worry if you don’t have enough sts for an even set of multiples, just get to the point where you don’t have enough sts left to skip 3, and just work your sc into the ch-4 space that you created previously. These socks are not about obsessively counting, remember, they are about sex and hormones and crocheting on Manitoba’s really crappy, bumpy highways which cause much too much distraction for the proper counting of stitches. Work about 12 rounds of ch-4 netting. Put it on and stretch towards your ankle. If it feels long enough, start working the heel. If not, work a few more rnds of netting. If ch-4 netting feels too tight, try ch-5 instead. Heel: Flatten sock widthwise and work from one side to the other: ch 1, turn, work 25 sc across one side. Ch 1, turn, work 24 sc, stopping short of the last st, leaving it unworked. Ch 1, turn, work 23 sc, stopping short as before. Repeat this row, working one less st, until you have 10 sts left. You should have a little triangle with steps on it. Turn the heel: Ch 1, turn, work across the 10 sc, and, working into the side of this st, and into the next sc below, make a sc2tog. Work a ss into the next side edge below. 11 sc. Turn. Skipping the ss, sc in the 11 sc, and work a sc2tog into the side edge of the 11th sc and the one below, then work a ss into the side edge below that. 12 sc. Turn. Repeat this process until you have “picked up” your original 25 sts. Carry on in netting pattern as before, only this time, ch-5 instead of ch-4. If you didn’t ch 4, then chain 1 more than your number. Work 12 rounds of ch-5 netting, try it on, tug gently to see how it fits – incidentally, it helps if you have a vehicle dash to do this on, as gravity will help you to tug and pull your netting into place. It also makes for interesting facial expressions of the folks in the oncoming lanes of traffic. Continue on, but this time, work the rest of your rounds in ch-6 netting. Do this until your sock, when stretched out, comes almost up to your knee. Next rnd: work one rnd in ch-5 netting Next rnd: work one rnd in ch-4 netting Next rnd: ch 3 (does not count as st), work one dc in each sc, and 4 dc in each chain sp. You may need to fudge to get a number that divides by two. Next rnd: Chain 3 (does not count as st) Work ribbing by working fpdc around first dc in row below, then bpdc in next dc in row below. Work fpdc, bpdc across, join with ss, ch 3. Work two more rnds of dc ribbing, fasten off. Weave in ends and enjoy your socks!!!!
Project ADD
 So while being bored of the knitted underwear project, I thought "hey! I have all the supplies for my Alexander McQueen beaded stockings!" And so I attempted to start it. For one, both of the patterns bookmarked have left the internet. For two, beading takes forever, and 27 of the 500 beads I threaded either didn't fit through the needle or broke. For three, crochet eats yarn so my toe cap work means I have to keep shoving 473 beads farther down the line, over and over again. For four, the new pattern I'm trying for the toe cap (after attempt 1 was a failure) is horrible horrible to work with and with my black, lace-weight yarn, I can't see shit. So it is on pause a mere 2 rows into the attempt.
I wanted happiness and more project ADD, so I started a completely NEW project: a "novelty" crocheted turban from 1915. Posted here. This one is going much better, although the stitch pattern is hilariously time-consuming and yarn-consuming, and the pattern is poorly edited. We shall see how it goes!
So while being bored of the knitted underwear project, I thought "hey! I have all the supplies for my Alexander McQueen beaded stockings!" And so I attempted to start it. For one, both of the patterns bookmarked have left the internet. For two, beading takes forever, and 27 of the 500 beads I threaded either didn't fit through the needle or broke. For three, crochet eats yarn so my toe cap work means I have to keep shoving 473 beads farther down the line, over and over again. For four, the new pattern I'm trying for the toe cap (after attempt 1 was a failure) is horrible horrible to work with and with my black, lace-weight yarn, I can't see shit. So it is on pause a mere 2 rows into the attempt.
I wanted happiness and more project ADD, so I started a completely NEW project: a "novelty" crocheted turban from 1915. Posted here. This one is going much better, although the stitch pattern is hilariously time-consuming and yarn-consuming, and the pattern is poorly edited. We shall see how it goes!
Wednesday, August 19, 2015
Concert Wear
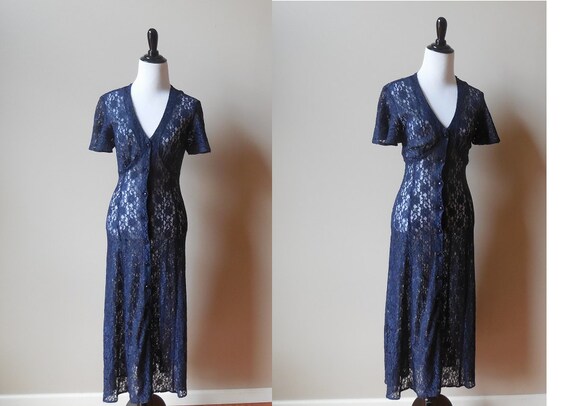
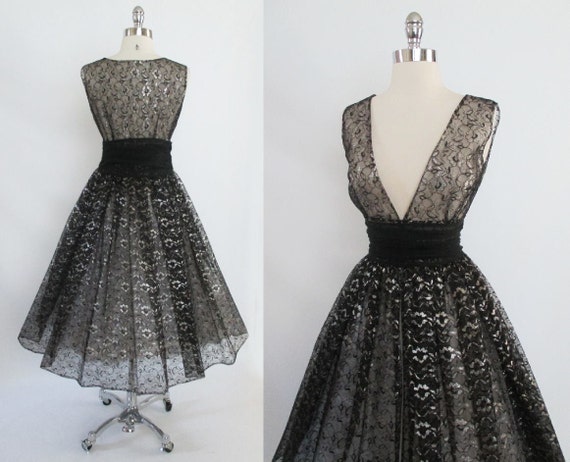
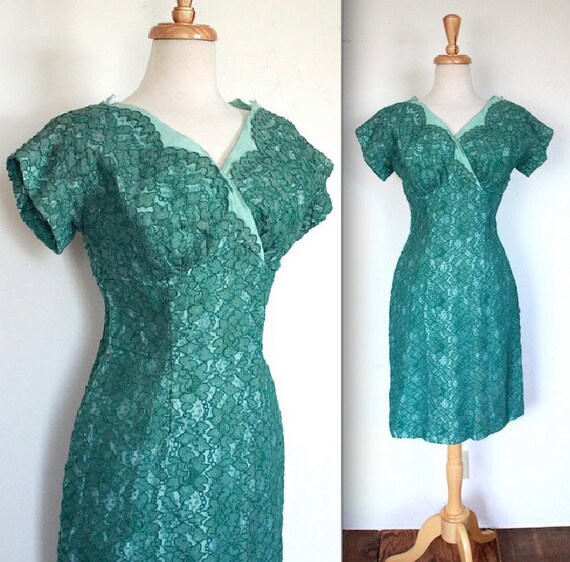
So my mother emails me, asking if a new jumpsuit on Modcloth is something I'd be interested in for concertwear. My current concertwear is: black silk or black velvet pants (depending on weather), black button up, black cropped tuxedo jacket OR black button up sweater if it's really cold. I took a look at the jumpsuit and a) it isn't worth $130 b) it's all synthetic. Ew. But, the style lines are cute, and it's remarkably similar to the cozitastic housedress/robe that I made this past spring.
So in an endeavor to copy this design, here are the pics. The jumpsuit shown is in teal because it's harder to tell style lines in black.



Sunday, August 16, 2015
Knitting Project Update
 Finished the first half of the shorts!
 Lookit how pretty it is. :-P
 Above the point is the torso tube seam, below the point is the leg tube seam.
 The elastic for the waistband gets threaded through the YOs here.
Saturday, August 15, 2015
Projects Simmering
 So there are a number of projects that are waiting for supplies, energy, or whatever.
Sewing Projects:
- my flannel "dress pants": I have the supplies, I need to rework the pattern, and just get my gumption up to deal with pants.
- my ex-wedding dress redo: I think I'm going to dye it, I have the dye, I just have to finish sewing the panels and finalize a design. I have all the trim ready. I also need to figure out what's going to happen with the bodice.
- the red wool plaid pinafore: I've been handsewing it, so it is getting off my ass and finishing the hem tape, hemming it, pressing it, pleating it, and figuring out the bodice.
- the purple wool "riding skirt" duplicate: I have this awesomely designed drop-front skirt that is super comfy and amazing. I have the wool (from Dorr Mills, the same as the red plaid), I just need to throw it together. And probably buy lining. Or not!
- my wedding suit: 'nuff said
- my partner's wedding suit: ditto ditto
- more pants for my partner: I have tons of fabric I bought to make pants. I should do that.
- the fur-lined alpaca coat: Yeah, I should finish that guy. I got all bummed out at how shitty handsewing fur is. But I'd like that coat to exist.
- my mother's fur collar: I dunno what the hell I did when I started sewing the lining. It needs to not be doing that.
- curtains for Jennifer: I need the measurements and final design from her.
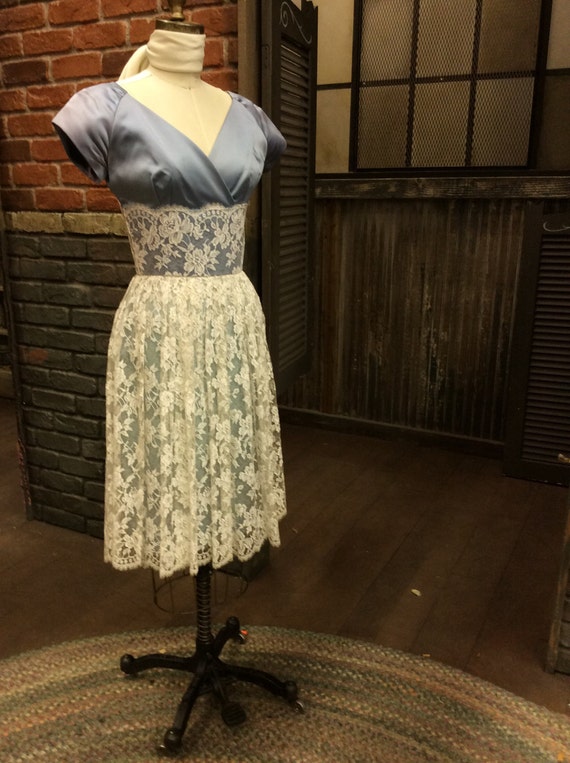
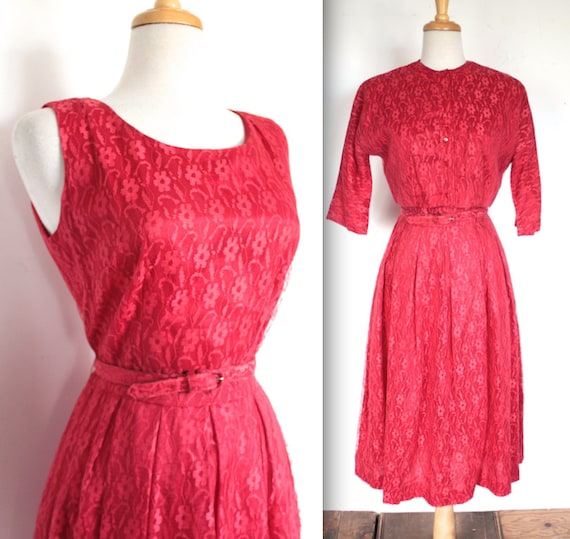
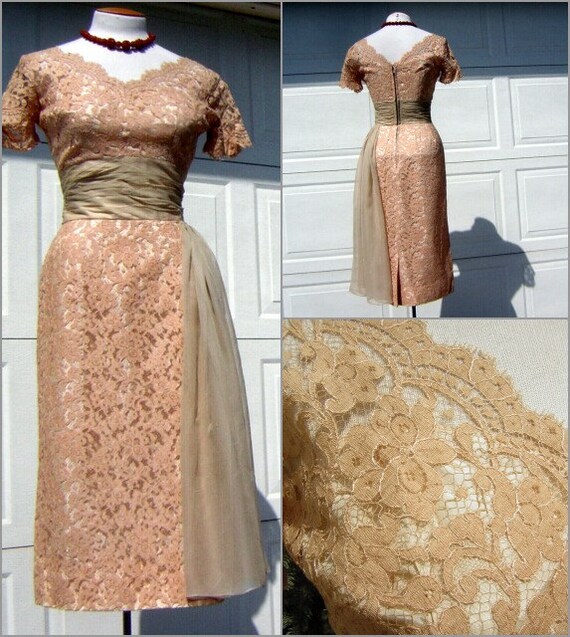
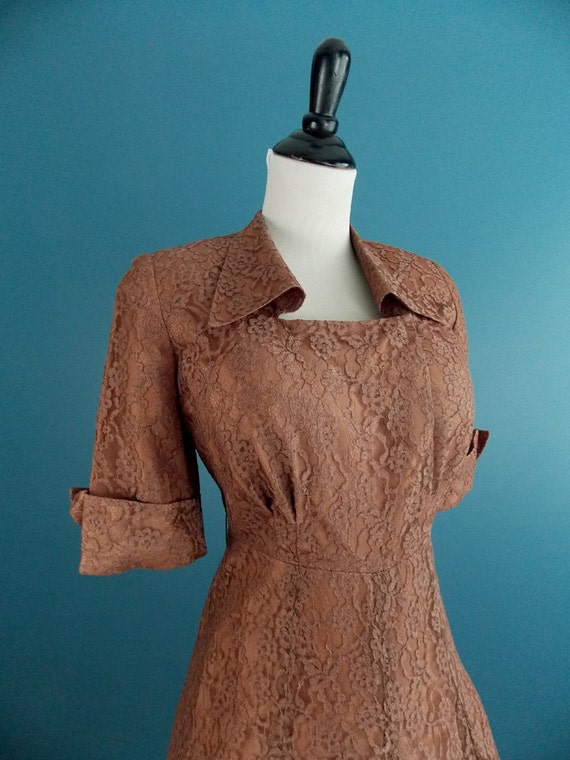
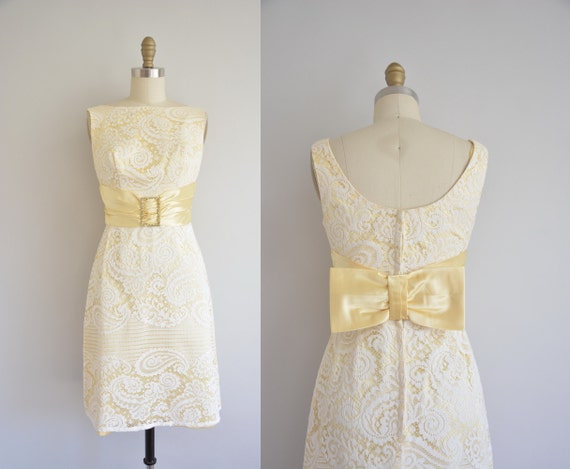
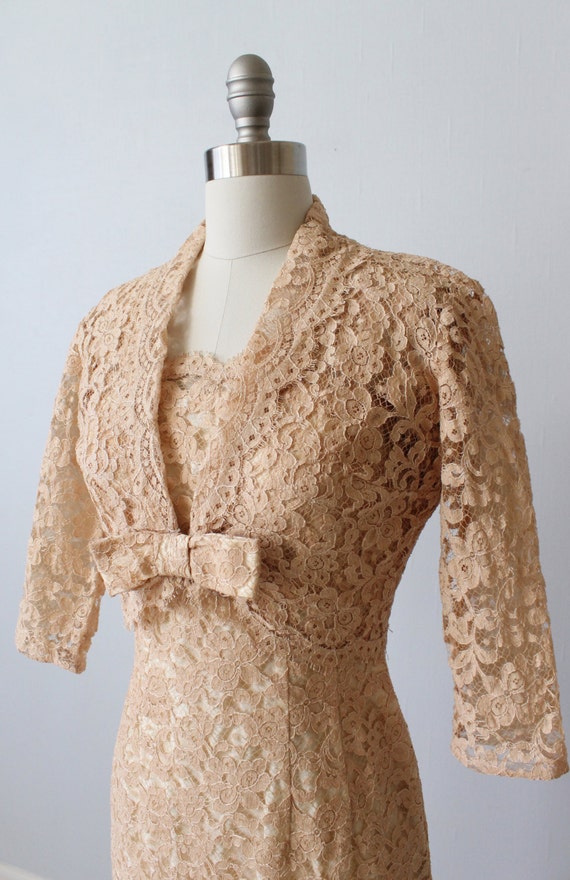
- vintage lace dress: since I'm NOT going to be wearing it to a wedding, what do I want to do with it?
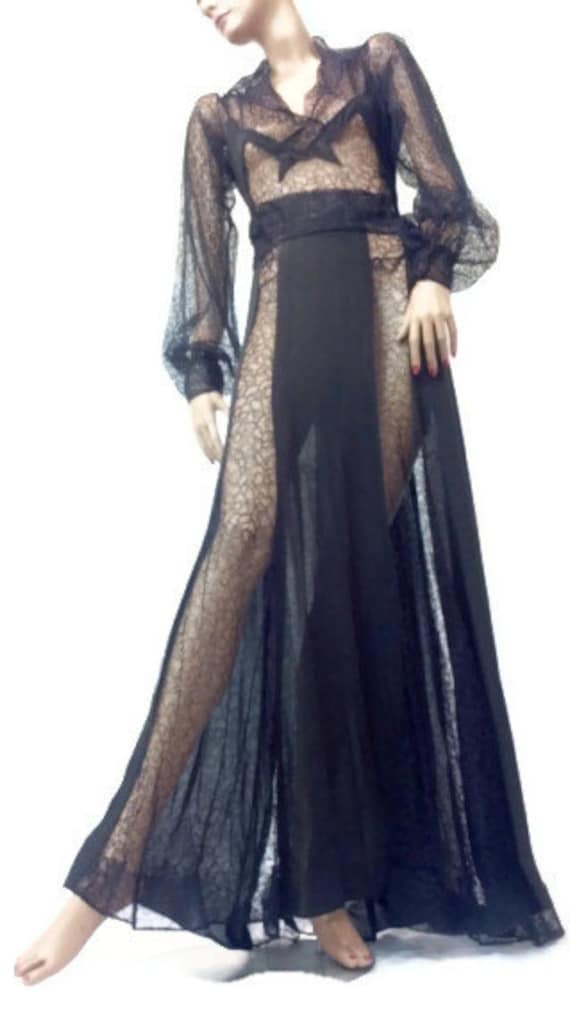
- sheer silk blouses: I need patterns, but I have the supplies. Oooh I can't wait to have them.
- fake fur pillows: self-explanatory
Knitting Projects:
- black cardigan: I need the supplies. I have the pattern.
- white knitted tights: I need the gumption. I have the supplies, but it's such a bitch working on it.
- the "Easy Vintage Sweater" bullshit: I need more navy wool from Michaels. I want that bitch done because it's so fucking stupid.
- the 20s cami/shorts set: I'm nearly done with one of the short pieces and have both of the cami pieces done. Sooooo close! It's just super boring and tiny needles.\
- brown sweater: I want to do a brown fisherman's cardigan/pullover. Like a dark nutty brown.
- beaded sweater: I want to do a beaded, vintage-style sweater.
- pillows: I want to do fair isle pillows.
Crochet Projects:
- baby blanket for Jen: she got married a year ago. Probs gonna have kids.
- baby blanket for Joni: she's getting married. Def gonna have kids.
- baby blanket for Cali: she's getting married. Probs gonna have kids.
- Alexander McQueen beaded stockings: I have the supplies. Need to finalize the pattern and get going.
- my MIL's scarf: I should prob get a nicer yarn for the outer section, and I also want to bead it. Also finish the main body.
- doily for Liz: haven't finished it, and I promised it forever ago.
So there are a number of projects that are waiting for supplies, energy, or whatever.
Sewing Projects:
- my flannel "dress pants": I have the supplies, I need to rework the pattern, and just get my gumption up to deal with pants.
- my ex-wedding dress redo: I think I'm going to dye it, I have the dye, I just have to finish sewing the panels and finalize a design. I have all the trim ready. I also need to figure out what's going to happen with the bodice.
- the red wool plaid pinafore: I've been handsewing it, so it is getting off my ass and finishing the hem tape, hemming it, pressing it, pleating it, and figuring out the bodice.
- the purple wool "riding skirt" duplicate: I have this awesomely designed drop-front skirt that is super comfy and amazing. I have the wool (from Dorr Mills, the same as the red plaid), I just need to throw it together. And probably buy lining. Or not!
- my wedding suit: 'nuff said
- my partner's wedding suit: ditto ditto
- more pants for my partner: I have tons of fabric I bought to make pants. I should do that.
- the fur-lined alpaca coat: Yeah, I should finish that guy. I got all bummed out at how shitty handsewing fur is. But I'd like that coat to exist.
- my mother's fur collar: I dunno what the hell I did when I started sewing the lining. It needs to not be doing that.
- curtains for Jennifer: I need the measurements and final design from her.
- vintage lace dress: since I'm NOT going to be wearing it to a wedding, what do I want to do with it?
- sheer silk blouses: I need patterns, but I have the supplies. Oooh I can't wait to have them.
- fake fur pillows: self-explanatory
Knitting Projects:
- black cardigan: I need the supplies. I have the pattern.
- white knitted tights: I need the gumption. I have the supplies, but it's such a bitch working on it.
- the "Easy Vintage Sweater" bullshit: I need more navy wool from Michaels. I want that bitch done because it's so fucking stupid.
- the 20s cami/shorts set: I'm nearly done with one of the short pieces and have both of the cami pieces done. Sooooo close! It's just super boring and tiny needles.\
- brown sweater: I want to do a brown fisherman's cardigan/pullover. Like a dark nutty brown.
- beaded sweater: I want to do a beaded, vintage-style sweater.
- pillows: I want to do fair isle pillows.
Crochet Projects:
- baby blanket for Jen: she got married a year ago. Probs gonna have kids.
- baby blanket for Joni: she's getting married. Def gonna have kids.
- baby blanket for Cali: she's getting married. Probs gonna have kids.
- Alexander McQueen beaded stockings: I have the supplies. Need to finalize the pattern and get going.
- my MIL's scarf: I should prob get a nicer yarn for the outer section, and I also want to bead it. Also finish the main body.
- doily for Liz: haven't finished it, and I promised it forever ago.
Subscribe to:
Posts (Atom)